WARNING: THIS BLOG CONTAINS BORING DETAILS ON MECHANICAL MINUTIA WITH EXCESSIVE PHOTOS AND WRITTEN CONTENT MANY READERS WILL FIND OFFENSIVELY TEDIOUS. READER’S DISCRETION ADVISED.
There is a serious dose of synchronicity hovering around the COLUMBIA III, from the many personal connections with her history to her continued engagement on the BC coast. Here is yet another example.
The COLUMBIA III is 63 years old. Her engine is 63 years old. Very few engines last 63 years. But the engine in the COLUMBIA III is no ordinary engine. It is a “Gardner”. A British made engine famous for its reliability, economical fuel consumption, size and quietness. Gardners are legend! So much so that when I purchased the ship 15 years ago an old timer stopped me on the street in Campbell River and asked if the rumour was true, “So you own the old mission ship now, do you?” and I answered affirmatively. “And what’s it got in it for power?” and I replied, “An 8L3, (the biggest Gardner)” and the old sailor pulled off his ball cap and started hitting me with it . . .”You lucky bastard! You’ve got the COLUMBIA III AND it has a GARDNER!!! I hate you!!” Whack, whack, whack with his hat.
But I digress, new Gardners have not been made for years and their numbers have dwindled. And the mechanics who know anything about them have dwindled as well. There was an elderly gentleman in Victoria who was the only known Gardner mechanic on the Pacific coast, but he retired in his 80’s over 15 years ago. But synchronicity struck again! Enter Terry Coak! Terry grew up in England and was trained as a marine mechanic. He apprenticed as a young lad when the system was more like being indentured. But Terry learned and learned well. He worked for decades on ships and the smaller vessels in the fishing fleet of Great Britain. And many of the fishing boats had Gardner engines. So Terry knows A LOT about Gardner engines . . . . now comes the cool part (if you are selfish like me). Terry decided to retire and move, with his wife, to . . . you guessed it . . . to CAMPBELL RIVER! The closest town/harbour to were we live and the COLUMBIA III is moored.
A real, live, genuine, smart, competent, and experienced Gardner Mechanic! Right in my closest port! Hallelujah!!
Each spring for the last 10 years Terry has come down to give the Gardner engine a check-up and we talked. Terry is about 75 now and starting, mind you, just starting, to dream of retirement from his job with Desolation Sound Yacht Charters. So I struck him a deal. When I finish my 2019 summer touring season I will bring the ship to Campbell River and you can take the heads off my engine and see what we find.
And Terry agreed. So…..
Cool Alert: Now there was some leg work to get settled before we commenced on the rebuild. After the all-important commitment by Terry the next crucial step is to secure parts. So I googled “Gardner Parts” and found a phone number in England. I then set my alarm and got up at 1 am to call England at business opening. I had found the engine serial number stamped into the block and I was ready when I made the call. It went something like this . . .
Ring, ring, ring . . .
“Hello, David Tobin here of Gardner Spares” . . . ( in the most perfect British accent. Instantly instilling confidence and good will!).
“Good Morning, This is Ross Campbell sitting out in British Columbia, Canada. I have an 8L3 and I need some parts.”
“Ok. Good day, sir. Do you have the serial number?
“Yes, 8L3 / 104634”
“Good. Let me put the phone down for a second as I run up stairs and pull the file.” (!!!!!! 63 years later???)
and three minutes later, David jumped back on the phone, “Yes, that’s the right serial number. The file shows that your engine left our Works in June 1955, bound for Canada.” WOW!!!!!!!!!!!!!!!!!!
So I ordered the initial parts that Terry thought I would need and had them shipped to Canada. . . That only took about 6 days total! Then Terry and I finalized a start date. I then needed to bring the ship down the day before work commenced.
November 9th, 2019: The COLUMBIA III had been out of the shed since the first of May. She made it home and into her shed in late October . . . But out she came again in preparation for her trip to Campbell River for the main engine top end rebuild.
I left the masts down, so I couldn’t use my radars. I had to pick a good day to travel the 3 hours to town.
Bye, bye, Diamond Bay. When will the COLUMBIA III make it home again?
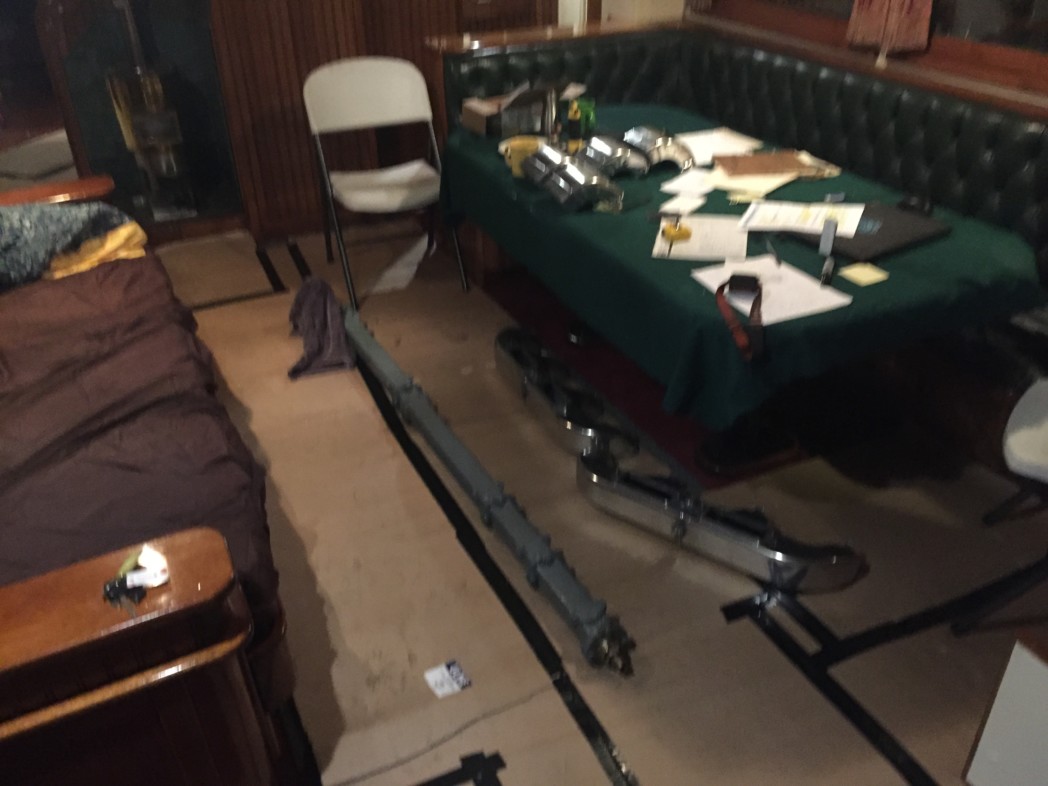
And the next day the work began. Terry arrived with his special Whitworth tools and we started dissembling the main engine promptly. Here the exhaust manifold is removed and the valve covers are off so we can loosen the nuts holding the heads down.
The water cooled exhaust manifold was very heavy, and we lowered it to the floor with a block and tackle. It stayed there for the whole rebuild. More later . . . 
and we broke the torque on the head bolts . . . 
and the first six heads popped off very easily . . 
But the #2 head (second from the bow) didn’t want to budge. We ended up using two small hydraulic jacks to apply steady, even pressure to slowly ease the head upwards. Once the head was off we inspected the studs and noticed that they were quite pitted. All the other studs were smooth and in “like-new” condition. With closer inspection we found that the small O-rings that channel the anti-freeze/coolant between the block and heads were degraded with age. It appears that the leaking antifreeze had corroded and ‘gunked up’ the studs.
I thought I had been “maintaining” the Gardner well over the years but it looked pretty scabby by the time we got the main bits apart. You can see the two nearest cylinders were the scabbiest. But HEY, nothing three weeks of cleaning, washing, degreasing, and painting can’t improve.
You can see the push rods sitting on the block. . . 
Here the heads sit on a bunk on the first day, waiting to get carried up the dock to Terry’s truck.
More heads on the engine room work bench . . .
Initially Terry suggested I cut round cardboard inserts for each cylinder to keep the dirt out. I added clean cloth scraps to seal around the card board. Given the amount of grease, crud, brass wire wheel shards and emery cloth dust involved, I was super paranoid about contaminating any of the cylinders. I changed the cloths frequently and vacuumed repeatedly. The Gardner has the unusual feature that the pistons travel up into a recess on the heads so that I could roll the engine over by hand and each piston, in sequence, would protrude about an inch above the block. This allowed me to vacuum around each piston. . . Repeatedly! I was really nervous that I would screw something up with all my cleaning so I was in hyper-vigilant mode!! Starting to look cleaner!
Another important point regards the cylinder walls. I am not experienced but the cylinder walls were beautifully smooth and shiny and free of marks or scratches. Terry thought they looked nearly new in condition. As the engine has always run very cleanly and started easily, (lots of compression) and with no smoking, we felt there was no need to inspect the pistons and rings further. Everything seemed to be fine below the heads and we felt confident with rebuilding the top end of the engine. I have been trying to maintain the COLUMBIA III as best as I am able and now I know what the inner workings of the main engine look like. I was confident in the Gardner before in a rub-my-rabbits-foot way. Now I KNOW I can be confident in it. 
I found the best tools for cleaning were a new paint scraper and a variety of brass wire wheels run in the chuck of my drill. The brass could get into all the corners without damaging the parent metal. It took about an hour to clean the top of the block for each cylinder. And then I emery papered the studs until they shone.
There is a really interesting component to this story; the financial side of an engine that lasts 60-100 years. The 10 studs that were pitted were structurally strong enough to remain in service, but Gardner Spares in England could ship me new studs in a few days. At $70 each they might seem unnecessary, but the studs had been in place for at least the last 60 years, so why not make everything perfect now? The price will be spread over the next 60 years.
Once I had the top of the block cleaned and the cylinders spotless I kept the engine well covered.
A big part of this story is poorly documented. Terry took the 8 heads to his shop and completely dissembled them. He called me when he had them apart to report that all was well. There were no broken springs or other bits and the valves were slightly pitted but nothing a good honing wouldn’t fix. By the time I got back up to Terry’s shop about 10 days later, he had reassembled the heads and painted them. 

Here is close up of the underside of the head with the two valves that Terry laboriously hand seated. The Gardner is unusual as it has no “head gasket”. The heads meet the block in a bare metal, finely honed metal to metal fit. Using a special Gardner tool, Terry had to hone the bottoms of the heads to a precision surface. It was a lot of hand honing . . . Terry said the main metal to metal seats entailed about a 1-2 hour hand-honing work-out per head!
Terry also dissembled the engine oil cooler. He cleaned the individual internal tubes, added a new 60″ long zinc anode inside and replaced all the gaskets when he reassembled it. Here is a peek into the inside of the oil cooler.
Meanwhile, back on the ship I continued my less fancy work. Because the exhaust manifold was too awkward to move, I had to clean the beast in place on the floor of the engine room. It got wire brushed, sprayed with degreaser, washed, rinsed, sprayed again with brake cleaning fluid, dried over heaters and then spray painted with primer and then two coats of grey engine paint. It was a filthy, smelly, time consuming job, especially bad as it was in my nice clean engine room getting every thing else dirty in the process . . . Oh the glamour of owning a wooden boat! and being a DIY’er!!!


Whilst Terry was doing all the work that needed a real mechanic, (someone with years of experience and a knowledgeable, stead hand), I was doing the dirty, mindless nonetheless fun and personally enriching de-greasing, cleaning, priming and painting of the main engine block and lots of various pieces. As I was living on the ship at the time, I painted outside as much as possible to reduce the ship board fumes. Nevertheless, I did take a hotel room for three nights as I repainted the main block. It was just too toxicly smelly to eat and sleep on the ship.
Here the injector fuel lines get a coat of primer on the back deck.
Everything was painted with three coats. So I tried to keep the rotation happening, even if it was a quick coat late at night, just before bed.
I also loaded up on automotive polishing supplies and went to work on the engine air intakes. Usually I have to travel several hours to pick up supplies but being in town with the boat was a novelty. I would often end up in Campbell River Equipment Supplies several times a day for more paint, or cleaning fluid or brass wire wheels. The guys at the counter knew me pretty well after my month at the dock.
As I was working on the ship I really missed having access to a bench vise to hold the parts in place. I ended up with the pieces clamped between my knees on the aft deck! I think I got as much polish on me as I did on the engine components.
But things got very shiny!
Here is my salon with parts awaiting polishing or painting. I bought a roll of cardboard and covered the floors to keep the carpet and flooring from getting soiled.
And the big day arrived! Here Terry is unloading his truck with 8 rebuilt heads! Ready to go back onto the engine. Exciting!!!

and one of the new studs . . . 
. . . and Terry gets the various gaskets ready before we installed the first head.
On the left side of the engine are the two holes that the push rods come up through and it’s the place all the oil lubricating the rocker arms returns to the base. Terry is placing the new O-rings that keep the oil where the oil is supposed to be right before we lower the heads into place.
There are also 4 O-rings per cylinder with little copper sleeves that direct the water/coolant from the heads through to the block. These little grommets had deteriorated and had been leaking coolant on the outside of the block. Terry concluded that we overhauled the engine at just the right time. There was no physical damage to the metal components but the rubber bits were failing and needed to be replaced. Not bad for ++ 30 years . . . There is no “head gasket” as such on a Gardner. The actual seal between the head and block is a hand-honed metal to metal fit. 
I rigged up a 7 foot metal bar lengthwise above the engine so the block and tackle could slide along to any position. Here the first head is lowered into place. I thought the ability to lower the head slowly and in control was a good idea as Terry had worked so hard to hone the bottoms of the heads to perfection. I didn’t want the honed surfaces to get scraped on all the metal studs sticking up out of the block. The first head is now in place. . .
Head number 2 in place . . . this is the head that was difficult to remove but now it slid easily into place on the 6 new studs shipped from England.
And heads 3 to 7 . . .
Here you can see the push rods sticking up and Terry seating the O-rings for the last head.
And the nuts go on the studs snugly but not tight . . . 
Then the long exhaust manifold and intake manifolds are bolted in place. Since the heads were not yet bolted down tightly they could individually align themselves squarely with the manifold. Then we could torque the heads down.
Torque the heads? . . . super easy! I watched and Terry worked up a sweat. I was such a great helper!
After the heads were all in place, Terry reset the valve clearances whilst I rolled the engine over by hand. We had also taken the “Gardner” name plates off the heads as the access hole offered a great lifting point. Now, with the heads torqued down, I could start blinging the old girl with my polished hardware . . . Bling is very important on the COLUMBIA III!
We had removed the fuel control on the second day and dropped it off in Campbell River for over haul. The report later was that the control was in excellent shape and required only a few parts and gaskets from England. Three weeks later we picked it up. Here Terry reconnects the two fuel controls in preparation for reinstalling. . . .
… on the engine . . . Note the levers that can pump fuel up to the injectors individually or lock out the fuel supply to any particular cylinder if one chooses. My old Skipper, Dennis Mattson, has the same engine in his fishboat and he often runs the engine with several cylinders isolated if he has to idle for an extended period. The engine then operates as though it is under a load and doesn’t soot up .. . .
Now here’s a story!!!!!!!!!!!!!!!!!!!! The injectors . . .
Settle in, this is going to take a while . . .
Terry and I took the 8 injectors to a local shop but after a couple of days they decided they did not have the capability to overhaul the injectors. . . . So I called Gardner Spares in England and arranged for the injectors to be overhauled there. Sounds simple. I paid $500 for next day delivery to England only to have British customs seize the package and demand 500 Sterling Pounds for import duties.That took a week to sort out. Then the folks at Gardner overhauled the injectors in just 4 days and promptly shipped them back to Canada. Unfortunately the courier stalled the shipment in Vancouver and waited a week to notify me! Then it took a mandatory 48 hours for the correct destination to take effect . . . What! It only took 48 hours to come from England . . . So we had about a week when Terry cooled his heels. I used the time to reassemble many of the ancillary components to the engine:
Here the new $600.00 coolant thermostat,
and reinstalled water coolant pipes and new silicone hoses and clamps . . . 
new hoses on the engine coolant pump . . .
and the coolant supply lines cleaned and painted and the hoses and clamps replaced

Here the coolant flow sight glass is cleaned and getting repainted . . .
and polished and re-installed . . . 
As we had the transmission cooler off I had it overhauled at a radiator shop in town and replaced all the hoses on the cooler and on the main engine. . . . I had it apart, so I may as well replace all hoses too!
I also used the waiting-for-injectors time for upgrading the ship’s radiant heat system of valving.
But the rebuilt injectors finally arrived from England . . .

. . . and were installed and the fuel lines replaced.
Terry then bled the fuel control and used the unique individual pumps that let him pump fuel up into each injector as I slowly rolled the engine over by hand to relieve that pressure on the cam shaft.
And finally there was nothing left to do but press the starter! The old girl turned over a few times and then simply fired up! Amazing! Terrifying!! I raced up on deck to check the exhaust stack but it was completely smokeless! Cleaner burning than before, even with a cold start.
Awesome! Phew!!!!
Here is a brief video of the first few moments when the Gardner fired up after the top end over-haul. IMG_5283
And Terry stood and listened and looked and listened and checked and inspected. There were a few water leaks on the fittings I worked on and one fuel leak on a fitting I neglected to tighten . . .
Checking the individual temperature of the exhaust ports.
Then we shut down the engine and re-installed some of the final bling, the valve covers I polished to a glinty gleam were reinstalled. 

Then we ran the engine again at the dock for about 30-45 minutes for Terry to give his final listen and visual inspection. It was quite anti-climatic (in a really good way!) when I helped Terry pack his tools off my boat and back up to his truck. A formal handshake and off he went. Wow, Terry! Thank you!
But before the COLUMBIA III left harbour Santa Claus was able to sneak a bottle of good scotch onto Terry’s work bench in his shop . . . .
Here is a seasonal uplift! I spend quite a bit of time, and some money, in the local ship’s chandlers, Ocean Pacific Marine, Enough time that most folks there know me . . . in a nice way. So as the engine rebuild was nearing completion I popped back into the store for the 10,245th time in the last month and they presented me with a present for being their favourite customer.
I’m sure they must have many “favourites” in Campbell River but I was willing to oblige them and shamelessly accept the gift and the boost to my ego . . . I left the store with a lighter step and an arm load of sweets!
Then as is usual after any major stay in Campbell River there reaches a point when all the work is done, the purchases are made, the test runs completed at the dockside and there is nothing left to do but leave. After 33 days, there were no crowds waving handkerchiefs, no brass band blaring triumphant fanfare . . . . nope. I just started the Gardner up, (no smoking and nice high compression start), untied the shore lines . . ..
and puttered out of the harbour.
But I had imaginary crowds waving and bands playing and maybe even a 3 gun salute . . . . it was a lot of work for the last 33 days and the first month of my winter “off” .
Finally!!! The COLUMBIA III is underway again! YAY!!!!!!!!!!!!!!!!!!!!!!!!!!!!! Leaving Campbell River!!!!!!!!!!!
And 3 hours later, just before I made it home, a few transient (Biggs) killer whales passed by. This is such a cool place to call home!
HOME!!!
And finally up in my house, a toast for the next 60 years on the venerable Gardner engine in the COLUMBIA III!
The next day, December 15th dawned sunny and warm and we slid the boat back into the shed for the rest of the winter. It seemed to me like I hadn’t had a day off since early September. . . Now I can start my winter maintenance!!!! (and write this blog!)
BUT! There were certain other pressing matters awaiting my return after being gone so long! Christmas was right around the corner and my grandson, Theo, was eager to get to work making presents for his immediate family and friends. The last few years have seen wooden toilet paper holders in the shape of Orcas, (and yellow excavators, Theo is a boy after all) and small wooden boxes for his sister’s treasures and one year, hand-sewn cloth bags for everyone. But as we were short of time I suggested a gigantic batch of Nanaimo Bars . . . one of the sweetest desserts on the planet. Here he is mixing a massive bowl of icing sugar and custard powder . . . 
And the “fruits” of his labours? Enough Nanaimo Bars to keep a dentist busy for a decade . . .
And finally, all wrapped into individual portions for his list of loved ones! “Merry Christmas Everyone!”
It’s a good thing i washed my hands when I got home!