A warning: If you are not really, really interested in classic wooden boat maintenance, you might want to skip this blog entry.
A 60 year old wooden heritage classic vessel needs a lot of TLC. A lot! We keep the ship as well as we are able and I am essentially fused to the task of ship’s maintenance throughout the year. We sand, we polish, we paint, we repair and renew the top sides and perform regular maintenance on the underwater portion of the hull every year. But in the normal course of events, a wooden hull needs maintenance that can’t be considered “regular”. That’s why I hauled the Columbia III in the fall to make some “assessments”.
The consequences of that inspection set in motion a chain of events . . .
As was usual in the construction of vessels 60 years ago, the Columbia III was made using large galvanized nails to hold the hull planking on. The ship was/is very heavily constructed with 2″x3″ oak ribs spaced on 10″ centers and covered with fir planking 2″ thick. Now I want you to think about this! This is like a house, except the studs are OAK not crappy spruce and there is only a 7″ space between each “stud”, and then the “walls” are not 1/2″ thick plywood spanning 15″ of space but full 2″ thick, clear, edge-grain fir plank spanning . . . yes, 7 inches!!! But given time, the weak link in the construction are the nails or “fastenings” as they are called. There comes a time when a boat is aging that it needs to be “refastened” and I decided the COLUMBIA III was due. The planks are good, the ribs are good, the nails were getting tired.
SO . . .
Last fall I started to “plan”. The first order of the day was to run to my mentor/skipper/shipwright guru, Dennis, and start mining him for data. Second was to arrange for new fastenings. This would seem like a simple matter but believe me it turned into an international treasure hunt. The ship was constructed with galvanized nails, but a better, more permanent method is to use silicone-bronze wood screws . So that is what I set out to find. This part of the story is way, way too long, but eventually I realized that silicone-bronze screws make “hens teeth” seem abundant and easy to find. After 6 weeks of phoning and internet searching I found a small, husband and wife foundry in Connecticut that could custom make 6500 3 1/2″ flat-head, square drive, cut-thread, silicone-bronze wood screws constructed from American made bronze. (‘Off-shore” metals are notorious for inconsistent metal quality and content). The “cut thread” portion is critical as cheaper “rolled threads” have a thinner shank diameter and would allow water to leak in around the screws underwater (according to Dennis) . The very long and the short is that I ordered the screws and they were custom made over a 6 week period in Connecticut and shipped to us. The planned arrival date for the screws set the calender for the haul-out of the COLUMBIA III. Oh, yes, one little detail, the screws cost $10,000.00.
You might appreciate that I lost some sleep planning this “event”.
In the lead up to the “haul-out” I planned for the tools we’d need, the supplies, and the crew. Fern planned for the food. We where to house the crew on the COLUMBIA III on land during the work and Fern ran the “hotel” and I ran the crew. One important step in the preparation was getting the boat itself ready for a working crew. We removed the leather cushions, covered the fancy salon carpet, added padding and a plastic cover for the highly polished table, and made plywood covers for the aft deck bright-work to protect them from tools.
Our first job was to build a shelter to protect our work area from the elements and for containment of the sandblasting that had to be done. The weather proved to be very nasty but our well-constructed shelter survived 3 separate 50 knot storms and lots of snow.
Here the sandblasting truck removed all the old paint from the hull to allow us to evaluate the wood and to see where the old nails were located. The big fabric sausage is catching the sandblasting dust to keep the area clean. Inside the “tent” we had a second plastic membrane lining the whole area to contain the toxic copper paint dust. A special vacuum truck and crew spent 7 hours vacuuming up the sand and paint for toxic waste disposal. 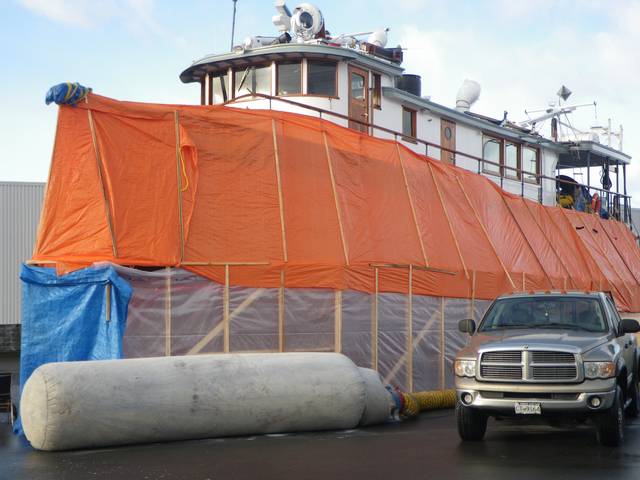

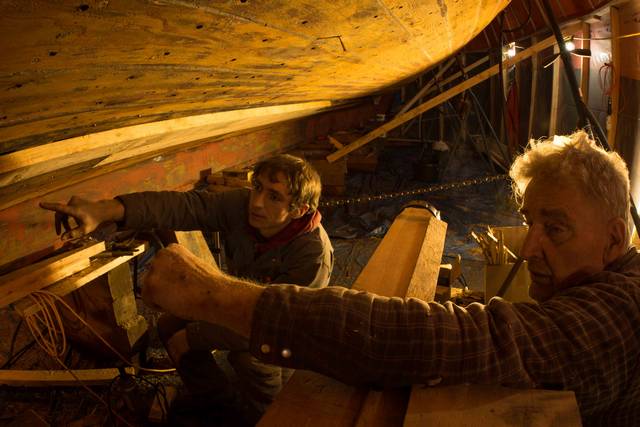
And then the work began. Here you can see the cement plugs covering the old nail fastenings which also indicate where the ribs are located. The crew then counter-sink, pilot drilled, and taper-bit drilled the new holes beside the old nails and then screwed in the new screws. This was a three man, tag-team process.

After the first storm I spent a day reinforcing the battens that held our tarps in place. And it was time well spent as it really blew twice more during the haul-out. Oh, and it snowed too! But inside was suitable for work.
“In for a penny, in for a pound”. We had to remove the external engine cooling pipes to access the planking there. The cooling pipes had a 18″ x 20′-0″ sheet of copper behind them to protect the wood from toredos and that had to come off as well. And if you have all that off, “a guy may as well” evaluate the planking that has been hidden for 60 years and cut out the less than perfect wood and replace it with new planks. Here Luke begins some surgery.
This is “for the record” shot. The planks measured out as 2 1/16th inch thick.
And the width of this plank came in about 7 1/4 “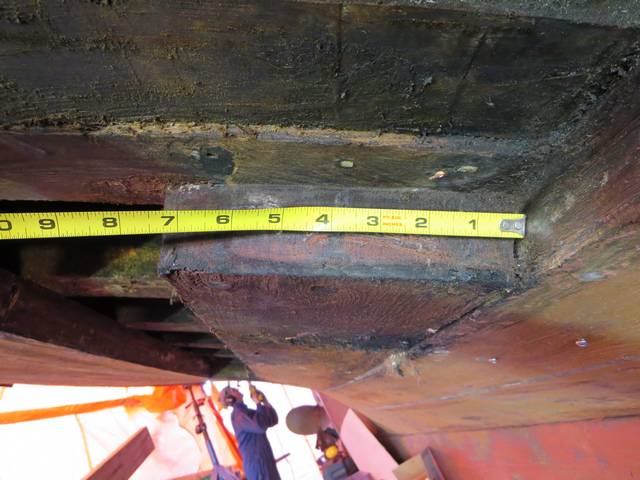
Here is a shot from the engine room with the floor boards up. It is pretty weird to see daylight under my feet where there is normally planking and then “ocean”.
The basic structure of our crew was this: Tavish, Steve and Josh were on the refastening team, and Luke and Dennis were on the replanking team. This was a great chance for Luke to work under Dennis’s direction and I essentially left the two teams alone. I managed. Meaning, I was the gopher and wallet and final decision maker . . . . well, Dennis was the final decision maker. “Ross, I don’t like that toredo worm hole and we are changing that plank.” Here Dennis is plugging old nail holes before the new planking goes in.
And Luke is preparing the new planks to fit the spots where the old were removed.
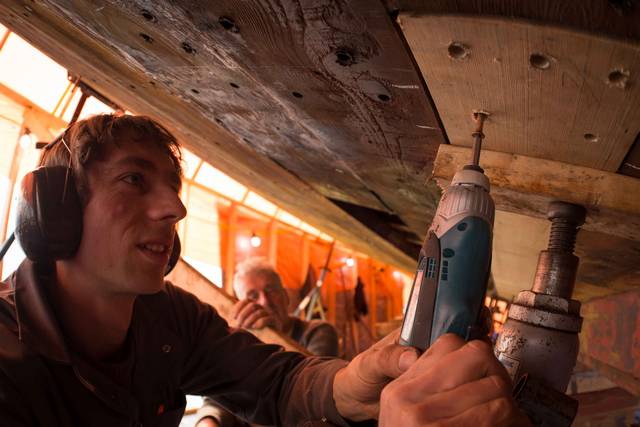
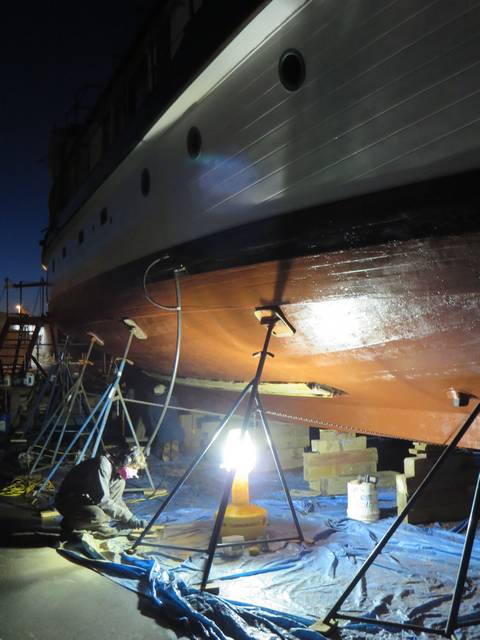
and the work days were long. 8 am to 7pm. But the crews made money and the job proceeded quickly. Good lighting was essential.

As Luke and Dennis concentrated on the replanking, the refastening team kept busy.
as the refastening team kept busy, the replanking team kept busy . . . 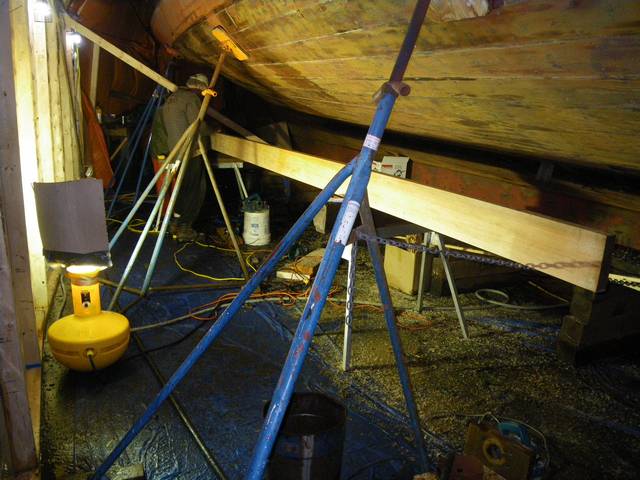
Fern had 3 meals a day waiting for the six “workers” and there were unlimited fresh cookies and squares, and baked treats waiting for every coffee break. These guys worked super fast, long and hard, and had the appetite to prove it! Fern was anointed “MVP”!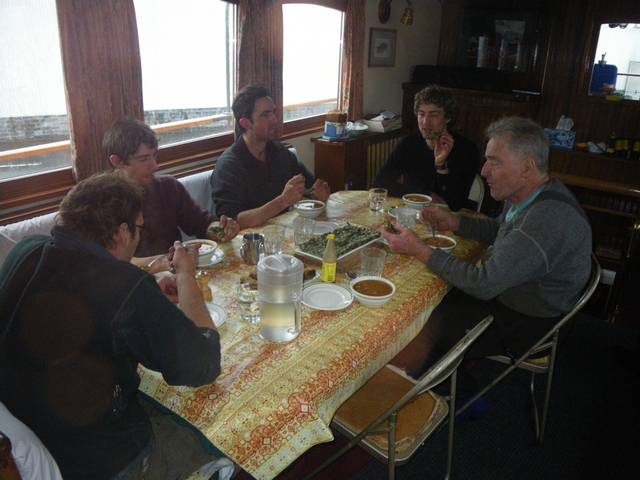
and the drilling and setting of screws continued . . .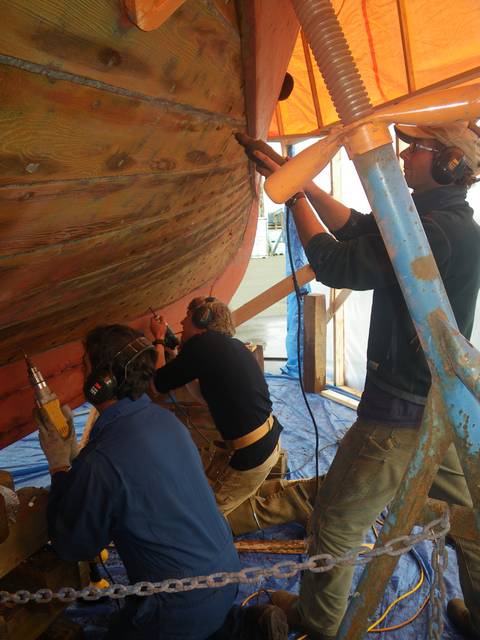
. . . day and evening . . .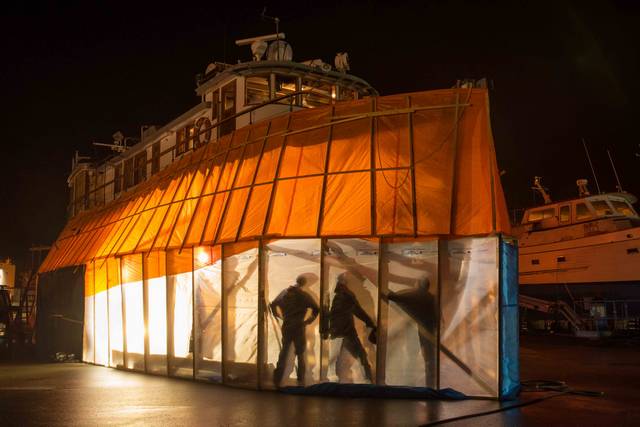

Here is another “for the record” shot. Clear, edge grain Douglas fir being prepared. By chance, we had a gorgeous, huge, 7 foot diameter old growth Douglas Fir tree blow over on our property in a big wind storm last winter . . . very convenient for a supply of perfect rare planking for this project.
Dennis has built many boats and his standards are frustratingly high. It is great to have high standards . . .” but really Dennis do we have to change a whole plank because you found one toredo hole ?. . . can’t we just plug the hole ?. . . . ” No. The plank came out.
The new planks start to go back in. ( A really good feeling. Chopping into the COLUMBIA III with saws and sledge hammers is the stuff of nightmares for me so it was nice to see the beautiful new wood go back on!) We used hydraulic jacks to hold and push the new planking into the curve of the hull.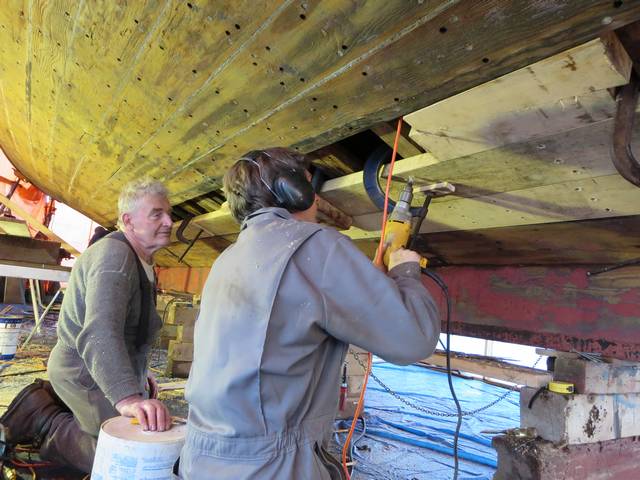
This shows the edge grain of the new plank and the special bevel that will later accept the cotton and oakum caulking that keeps the water on the outside of the hull. A good thing! Note mentor Dennis, labourer, Luke.

If you look closely at this photo you will get a sense of the work area. I swept and hosed out the area in the shed each night after the crew went for dinner, mainly to keep the area organized enough to make for efficient work. So the ground here is covered in extension cords, shavings, sawdust and tools . . . that day’s accumulation. The crew would start fresh the next day.
The next step in the refastening was to plug all the new counter-sunk holes with cement. That sounds simple but Dennis took the 5 of us and spent about 15 minutes showing us how he wanted the cement mixed and EXACTLY how he wanted it pushed into each hole to avoid air pockets or any voids that would allow for toredos to gain access later. I didn’t know there was so much to know about cement and a 1/2″ diameter hole 1/2″ deep! Josh is using a “palette” that Dennis made to cement the area above the propeller.
The “refasteners” catch up to the re-plankers.
So then the “refastening team” became the “re-caulking team”. And Dennis taught us how to hammer first cotton and then oakum into the new seams. Dennis also inspected the entire hull for suspect caulking deterioration and he pulled out what he didn’t like and added it to the list of areas that needed recaulking. There was a system of chalk marks which allowed Dennis to mark areas needing attention, the crews to mark areas completed and then Dennis would go over the entire seam one final time checking the workmanship and write on “OK” so the cementing team can finish the process.
Dennis found another area near the water line that he “didn’t like the look of” and off came two more planks. Once these planks were off it exposed the ribs at the the “turn of the bilge” which is the area of the greatest bend between the flat vertical sides of the hull and the flattish “v” shape of the lower reaches of the hull. When the ribs are initially installed, they are steamed to allow them to form to the tight radius bend. After 60 years the oak can crack at this point of compression. Dennis wanted to strengthen this area if we are “in there” already. So we made laminated “sandwiches” of oak and slipped the gooey, epoxy gluey rib into place and clamped it for the night with heaters applied. The final result: 10 sistered ribs (as they are called) and 2 new planks and the waterline gumwood replaced and refastened with screws.
Here Luke is “cupping” the back side of the new plank to conform to the curvature of the hull at this curvy “turn of the bilge”.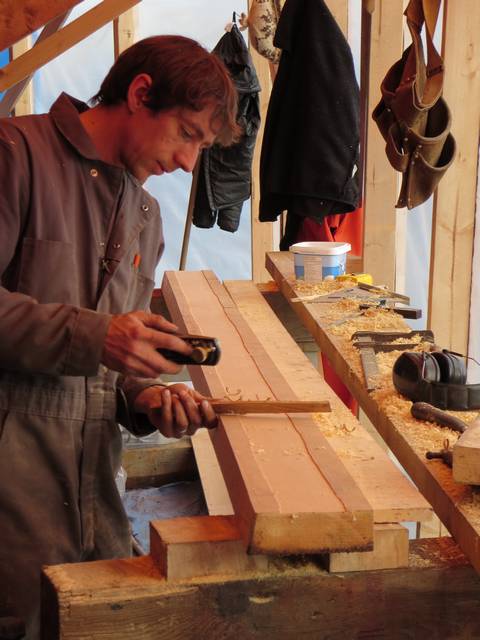
This was a chance for Dennis to pass along some of his vast knowledge of shipwrighting. Sure I was paying for him to explain and to quality check, and for the crew to stand and listen, but Dennis can’t live forever and this was a rare opportunity for these young guys and i was happy to oversee it.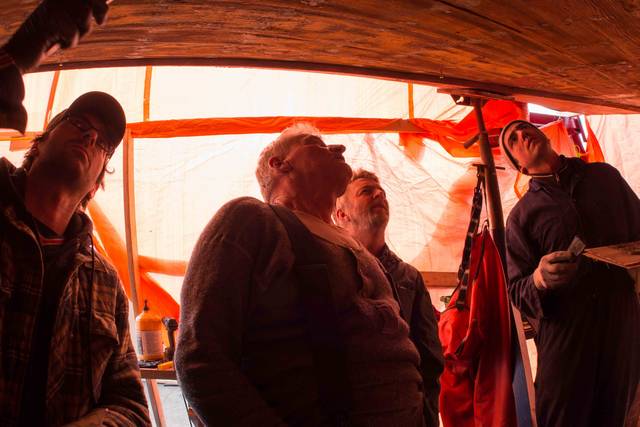
and Steve kept cementing . . . 
and Josh and Tavish kept caulking . . . 
and Dennis and Luke kept planking . . . 
Dennis doing a final check on a section of new seam.
My main role was as a “go-for”. I tried to keep the crew supplied with the right screws, planking, paint, oakum, cotton caulking, cement, tools, cords, lights, nails, oak, copper sheeting, anti-freeze, tar, drill bits, countersink bits, extension bits, screw-driver bits, paint rollers, trays, brushes, construction lumber, tarps, plastic rolls, paper towels, rags, sanding discs, hose, disposable gloves, plywood , , , I think you get the idea . My Visa card was smoking and every “guy” store in town knew the Columbia III was in the shipyard. Here Tavish yelled, “Dad! stand by the bow for a second and smile!”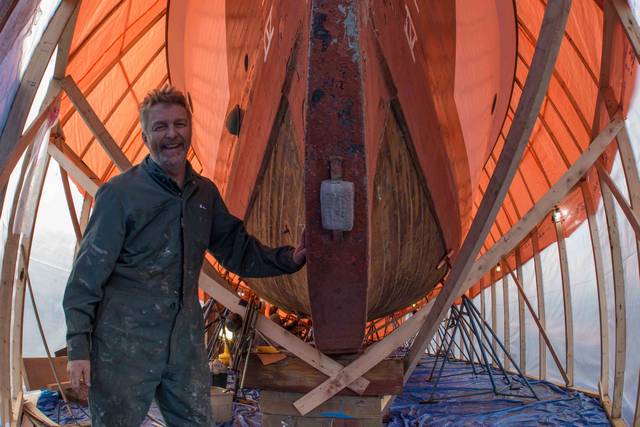
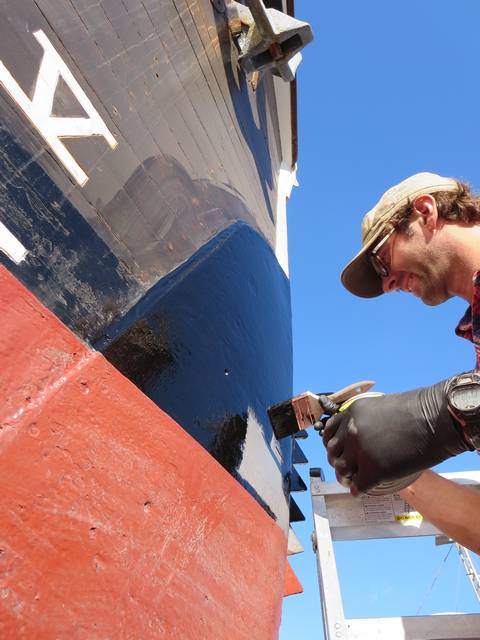
And finally, some copper paint started to cover the new fastenings and planking. The area that would eventually be covered with copper and the cooling pipes had to be painted twice before being hidden for the next 50 years. This was a momentous moment! Finally starting to look like a finished boat again!
And it blew 50 knots again and then it snowed again . . . on the outside of our shelter. Note the new holes cut in the plastic to vent the copper paint fumes. We had to paint at the end of the working day to allow for airing over night.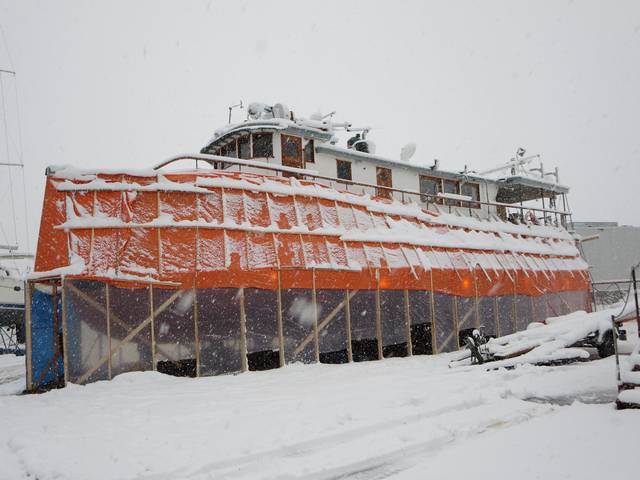
And then the copper paint started to go back on the new planking near the water line.
After two weeks, the bulk of the work was winding down. Steve took the shed down and the sun blazed as though it was May. Tavish and Josh left. Luke still had to reinstall the cooling pipes and create the wooden guard boards that protect the pipes from damage.
2″ x 4″ x 20′-0″ clear fir “guards” for the cooling pipes.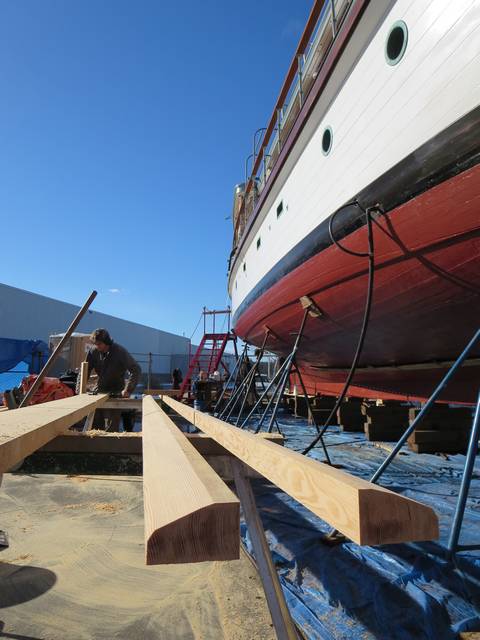
The sun was out, Steve was touching up the bow iron and Luke kept wood working.
But the work still continued into the dark each day.
Jacking the guards up to the pipes.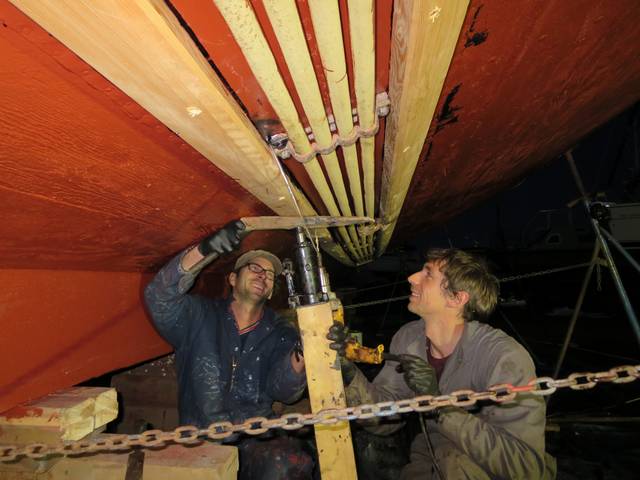
Here the cooling pipes are back on. Note the new 23′ 0″ x 18″ sheet of copper nailed to the hull to protect the wood from toredos (wood-eating sea worms). I special ordered the copper sheet and it came in a custom made plywood box 10′ x 4′ and inside was a specially made cardboard box labeled “ALASKA BRASS and COPPER COMPANY” and inside the cardboard box was THE shiniest piece of polished copper you ever did see!!! It truly looked like a sheet of gold. But we cut it to size, smeared it in tar, nailed it (VERY MESSILY!!!) to the hull and painted it red with copper paint. The whole affair happened at night and we were all so covered in tar that photos were not on the agenda. Just reaching into the cans with the special silicone bronze ring nails , my fingers came out bristling with nails stuck to all my tarry fingers. You can also appreciate Luke’s work in the Douglas fir “guarding” around the pipes to protect them from damage.
And of course, it snowed again!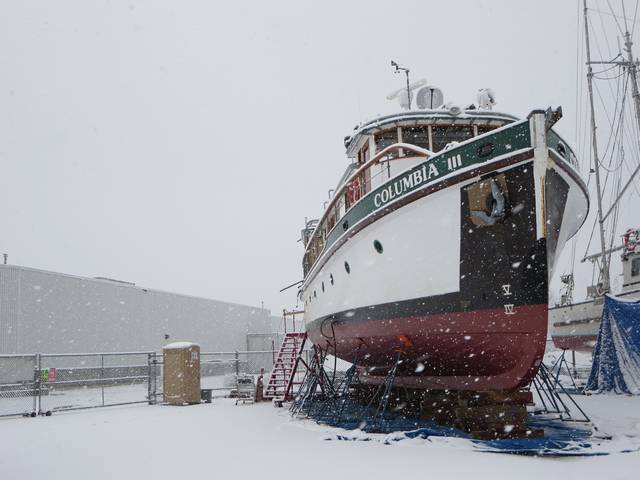
Here is me all a jumble of nerves and empty walleted. The travel-lift is fired up and coming to pick up the COLUMBIA III.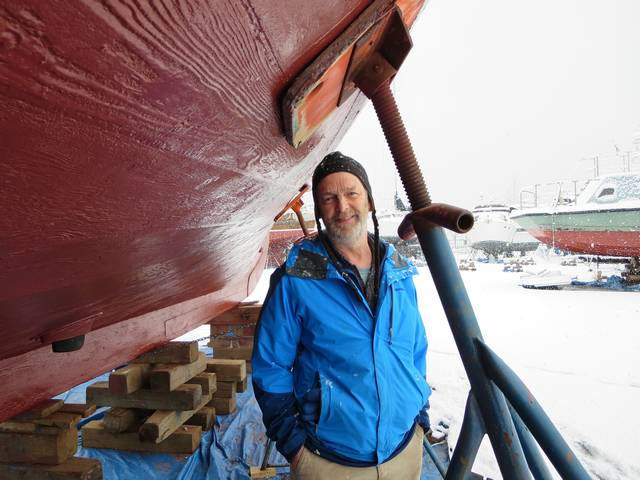
Up, up and away.
A few final copper paint touch ups to get the spots hiding behind the support stanchions.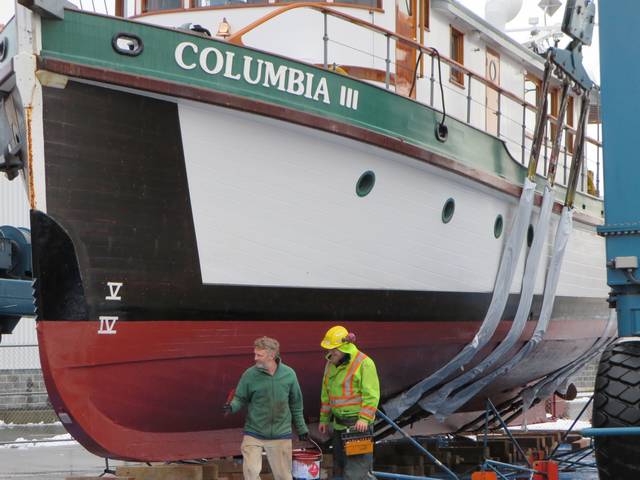
March 3rd, the COLUMBIA III finally goes back into the water . . . . I nervously inspected the bilges for water . . . did we miss a seam? did we over look something? did someone not follow Dennis’s instructions closely enough? did Dennis miss something? . . . .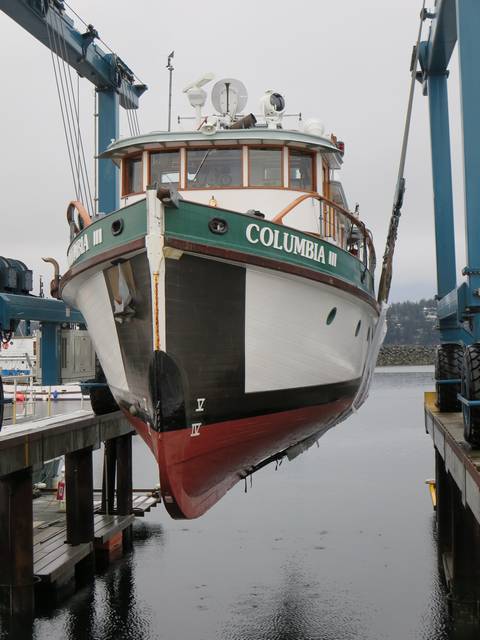
But the bilges were dry, the work was well done.
We motored the 3 hours home and immediately put the Columbia III back in her shed.
I sat at the galley table alone and had a glass of scotch.
Phew!!!!!